CPR: Full CPR. Single responder. Rescue mouth-to-mouth breaths
Требуемые условия завершения
Authors: Rednenko V.V.
Editor: Rednenko V.V.
Clinical situation:
In the evening on the street you saw a woman (about 60 years old) lying on the ground with her eyes closed. There is no one around except you.
Equipment for the practical skill:
- protective medical gloves;
- СPR simulator;
- medical mask or face shild.
The procedure for performing a practical skill:
- Check the accident scene. If the accident scene is save, say “Save”.

- Take a kneeling position at the side of the person.
- Check the person's consciousness (check the person for a response):
- shout to get the person’s attention (option: ask loudly "Are you all right?").

-
- If there is no response, tap or gently shake the person’s shoulder (if the person is an adult or child) or the bottom of the person’s foot (if the person is an infant) and repeat "Are you all right?"

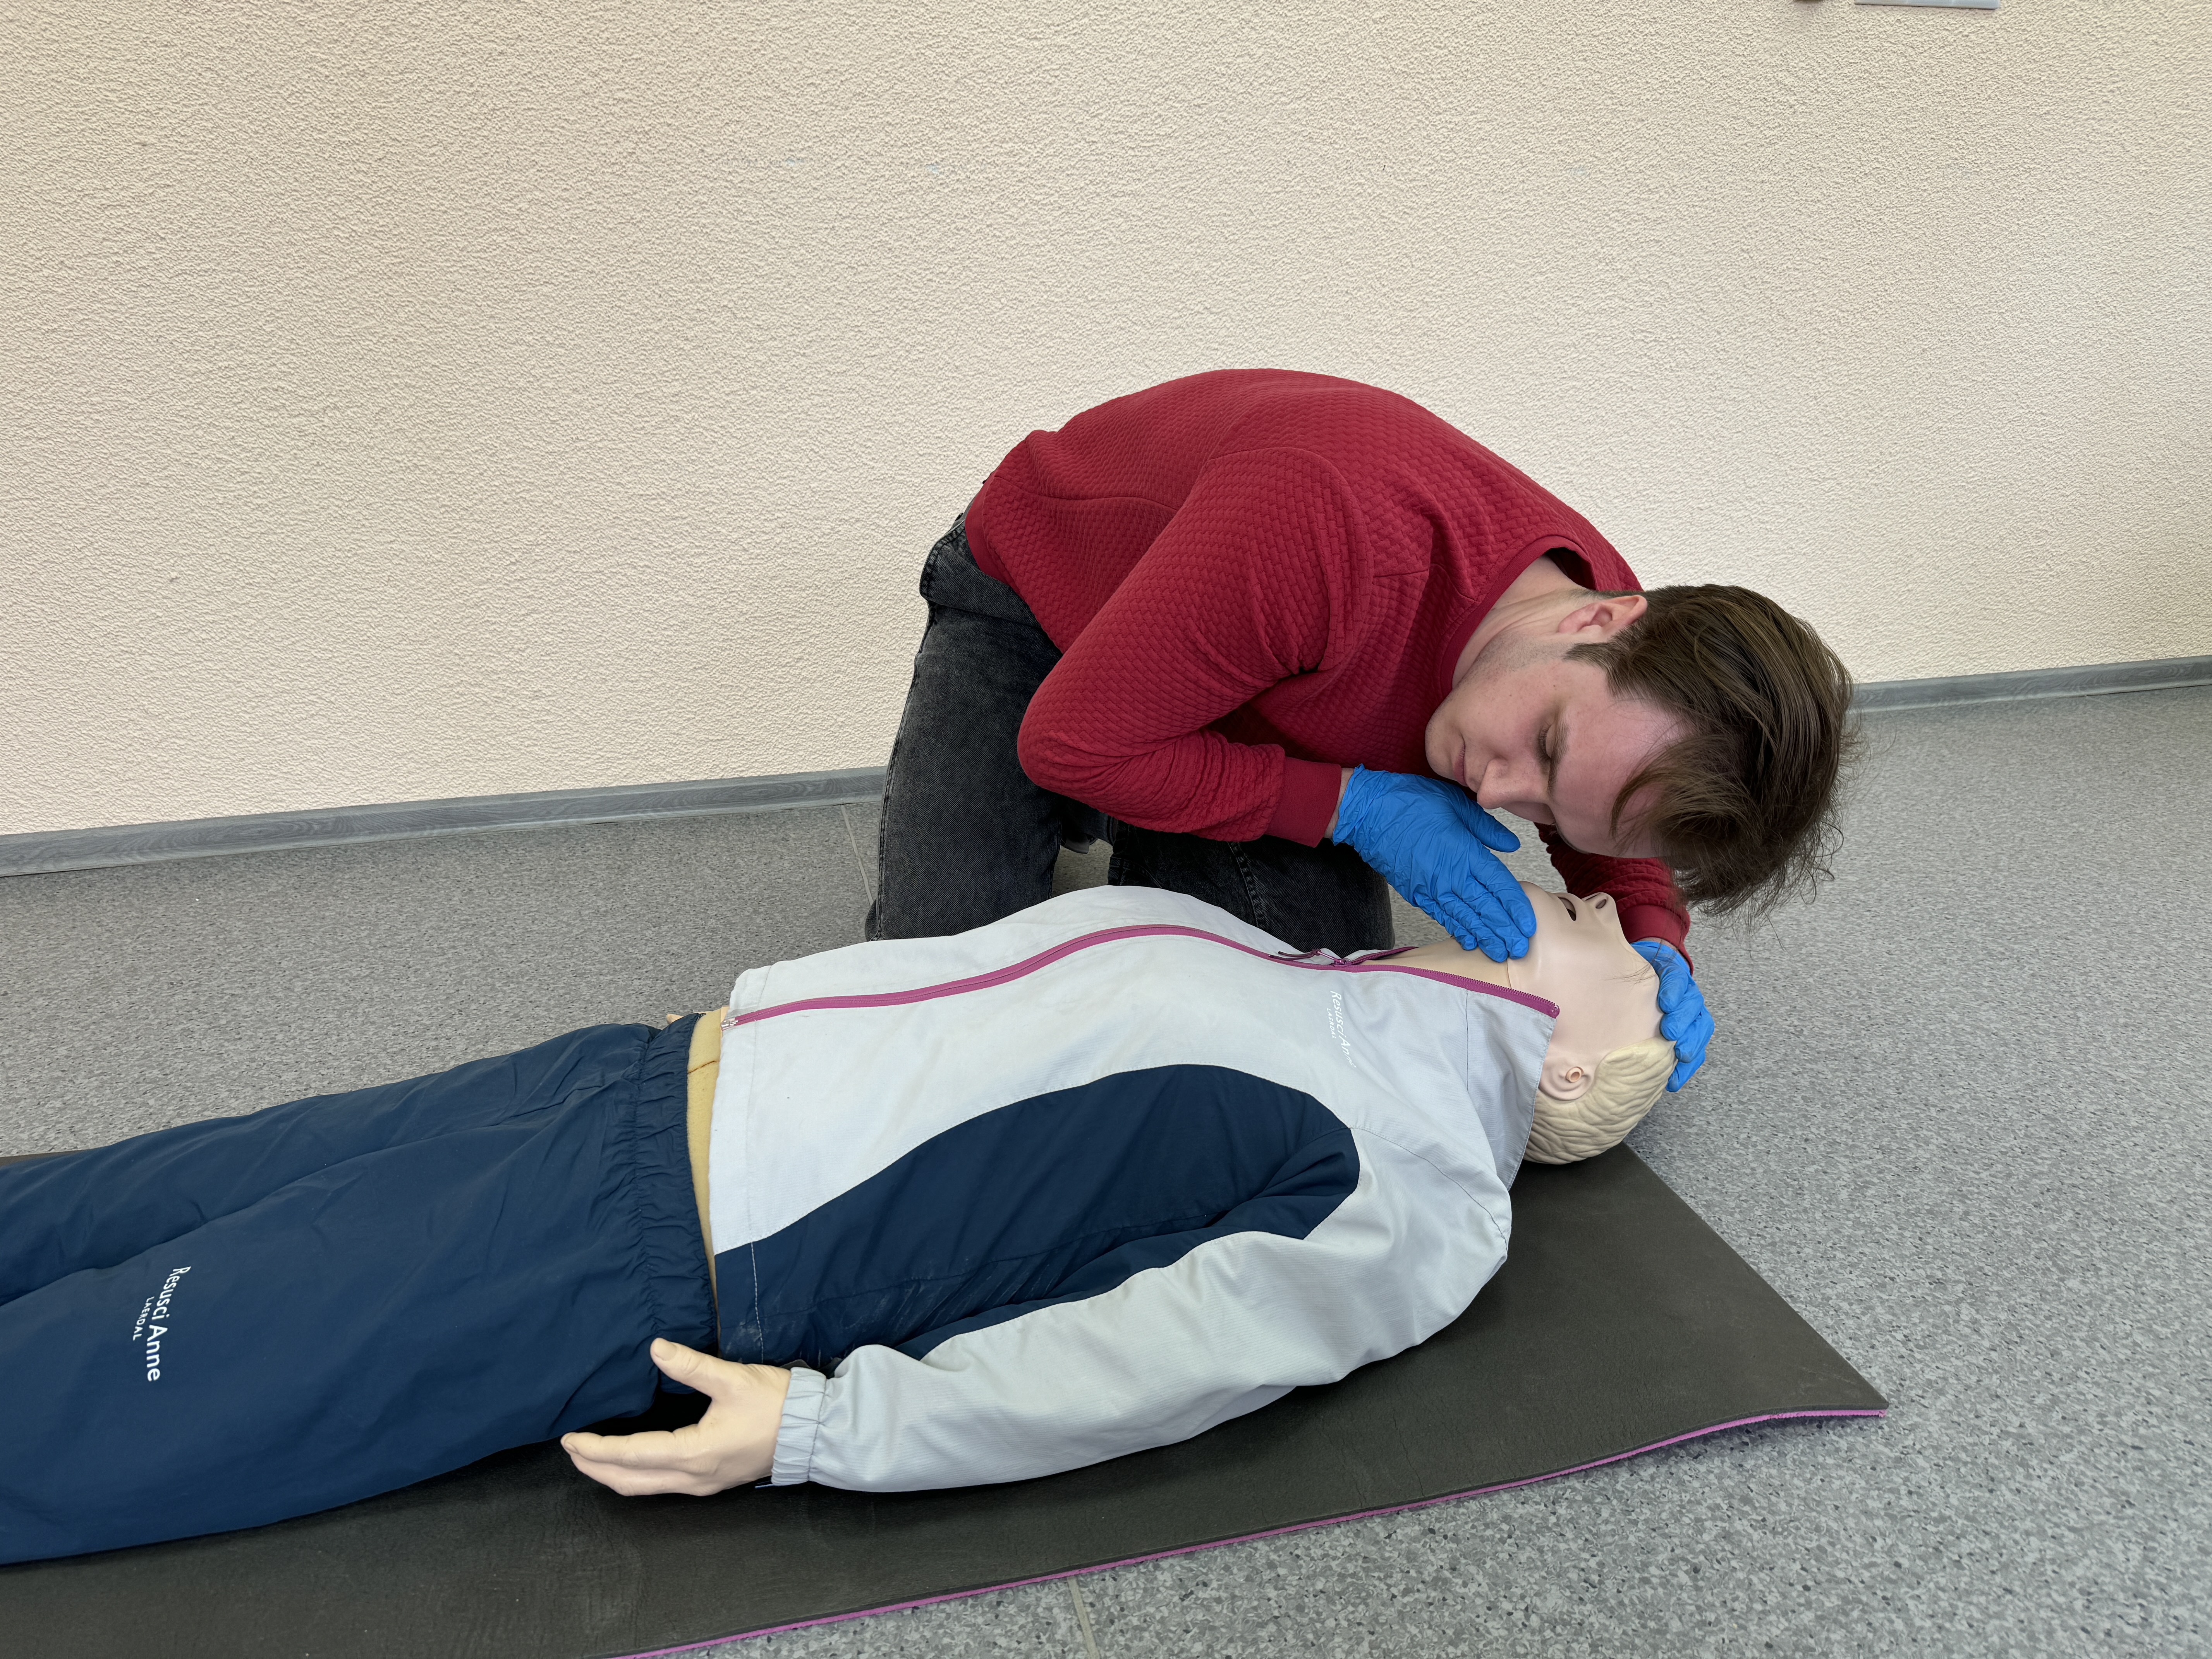
- Open the airway:
- place your hand on his forehead and gently tilt his head back;
- with your fingertips under the point of the victim's chin, lift the chin to open airway.

- Check breathing:
- look for chest movement;
- listen at the victim's mouth for breath sounds;
- feel for air on your cheek;
- look, listen and feel for no more than 10 s to determine if the victim is breathing normally.
- Check the carotid pulse (This is done simultaneously with checking for breathing):
- locate the carotid artery medial to the sternomastoid muscle (between the muscle and the trachea at the level of the cricoid cartilage, which is in the middle third of the neck);
- with the pads of your three fingers, gently palpate the carotid artery, one at a time;

-
- avoid palpating the upper third of the neck, because this is where the carotid sinus area is located. you want to avoid pressure on the carotid sinus area because this can lead to vagal stimulation, which can slow the heart rate, particularly in older adults.
- Call to EMS (103) and provide information about:
- person condition: “Person is unresponsive without breath and pulse, there are no visible injuries”;
- location of the emergency: “Location is street Pobedy, 65”;
- nature of the emergency: “There's no visible danger”
- level of the first responder training: “I'm a doctor”;
- what are you planning to do: “I’m starting CPR”.
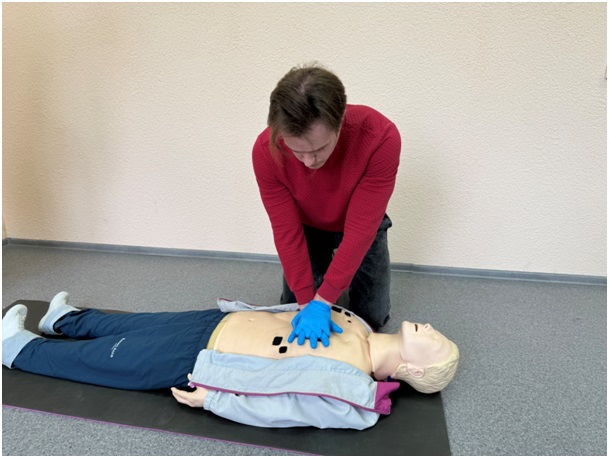
- Start chest compressions counting them (up to 30)
-
- Determine the compression point on the sternum:
- place the second and third fingers of both hands in a V-shape from the jugular notch to the xiphoid process to divide the sternum into three equal parts;
- Determine the compression point on the sternum:

-
-
- the compression point is the point between the lower and middle third of the sternum (the index finger of the hand located closer to the xiphoid process is located on it);
- Position your hand at the selected compression point so that:
- the center of the palm heel coincides with the selected point on the sternum;
- the palm was perpendicular to the midline of the sternum;
- the line of contact between the palm heel and the sternum coincided with the midline of the sternum.
-

-
-
- place the second hand on top of the lower hand in a position similar to the lower hand;
- interlace the fingers of both hands;
- pull your fingers upward until only the heels of your palm touch person’s sternum along the midline.
-

-
- Position your body so that your shoulders are directly over your hands (vertically) and keep your arms straight.
- Keeping your arms straight, push down using your body weight at a rate of 100-120 compressions per minute to a depth of at least 5 cm, but not more than 6 cm.
- After each compression, release all the pressure on the chest without losing contact between your hands and the sternum (let the chest completely return to its normal position).
- Maintain a smooth, steady down-and-up rhythm and do not pause between compressions.
- After 30 compressions give the person "mouth-to-mouth" rescuer breaths
- Put on the medical mask or a special face shield on the person's face to cover mouth and nose

- Open the airway again:
- with your hand on the forehead and your fingertips under the point of the chin gently tilt the person’s head backwards, lifting the chin to open the airway;
- hold the person's head in this position with your fingers under the chin.

- Give 2 rescue breaths
- Pinch the soft of the nose closed, using the index finger and thumb of your hand on the forehead.

-
- Allow the person’s mouth to open, but maintain chin lift.
- Take a normal breath and place your lips around the person’s mouth, making sure that you have an airtight seal.

-
- Blow steadily into the mouth whilst watching for the chest to rise, taking about 1 second as in normal breathing. This is an effective rescue breath.
- Maintaining head tilt and chin lift, take your mouth away from the person and watch for the chest to fall as air comes out.
- Take another normal breath to achieve a total of two rescue breaths. Do not interrupt compressions by more than 10 seconds to deliver the two breaths even if one or both are not effective.
- Continue with chest compressions and rescue breaths in a ratio of 30:2.
- Do not interrupt resuscitation until:
- The person is definitely waking up, moving, opening eyes, and breathing normally
- or you become exhausted
Последнее изменение: вторник, 4 марта 2025, 08:16